


If you’re about to embark on your online tabletop RPG journey for the first time, chances are that your Game Master uses Roll20 as their virtual platform. It’s one of the oldest names in the game, and aims for simplicity in its presentation and use. There’s also the fact that Roll20 costs nothing and that its interface supports popular games like D&D, Call of Cthulhu, and Monster of the Week.
Yet despite Roll20’s emphasis on being usable by all skill levels, it’s perfectly understandable to look at all the options presented and feel overwhelmed. To help you tackle your first Roll20 game with more confidence, we here at StartPlaying put together a little guide on how to use Roll20 as a player.
If you’d rather just have an actual person help you by playing a game with you, check out our beginner-friendly games on StartPlaying!
What Type Of Roll20 Account You Need
In order to play games on Roll20, you need to create an account. Given that this is 2022, I’m going to assume that you know how to enter your email address and make up a password. The only thing that might require clarification is what kind of account you need.
Roll20 has three types of accounts: Free, Plus, and Pro. To be a player in an online game, a free account works just fine. Plus and Pro give perks that are more aimed towards those running the games. You can consider paying for those upgraded plans if you ever decide to become a GM. For now, just create a free account.
How To Join A Game On Roll20
If you’re lucky, you already have a gaming group ready to go. In which case you’re just here to learn about Roll20 before your first session starts, and you can scroll down to the next section.
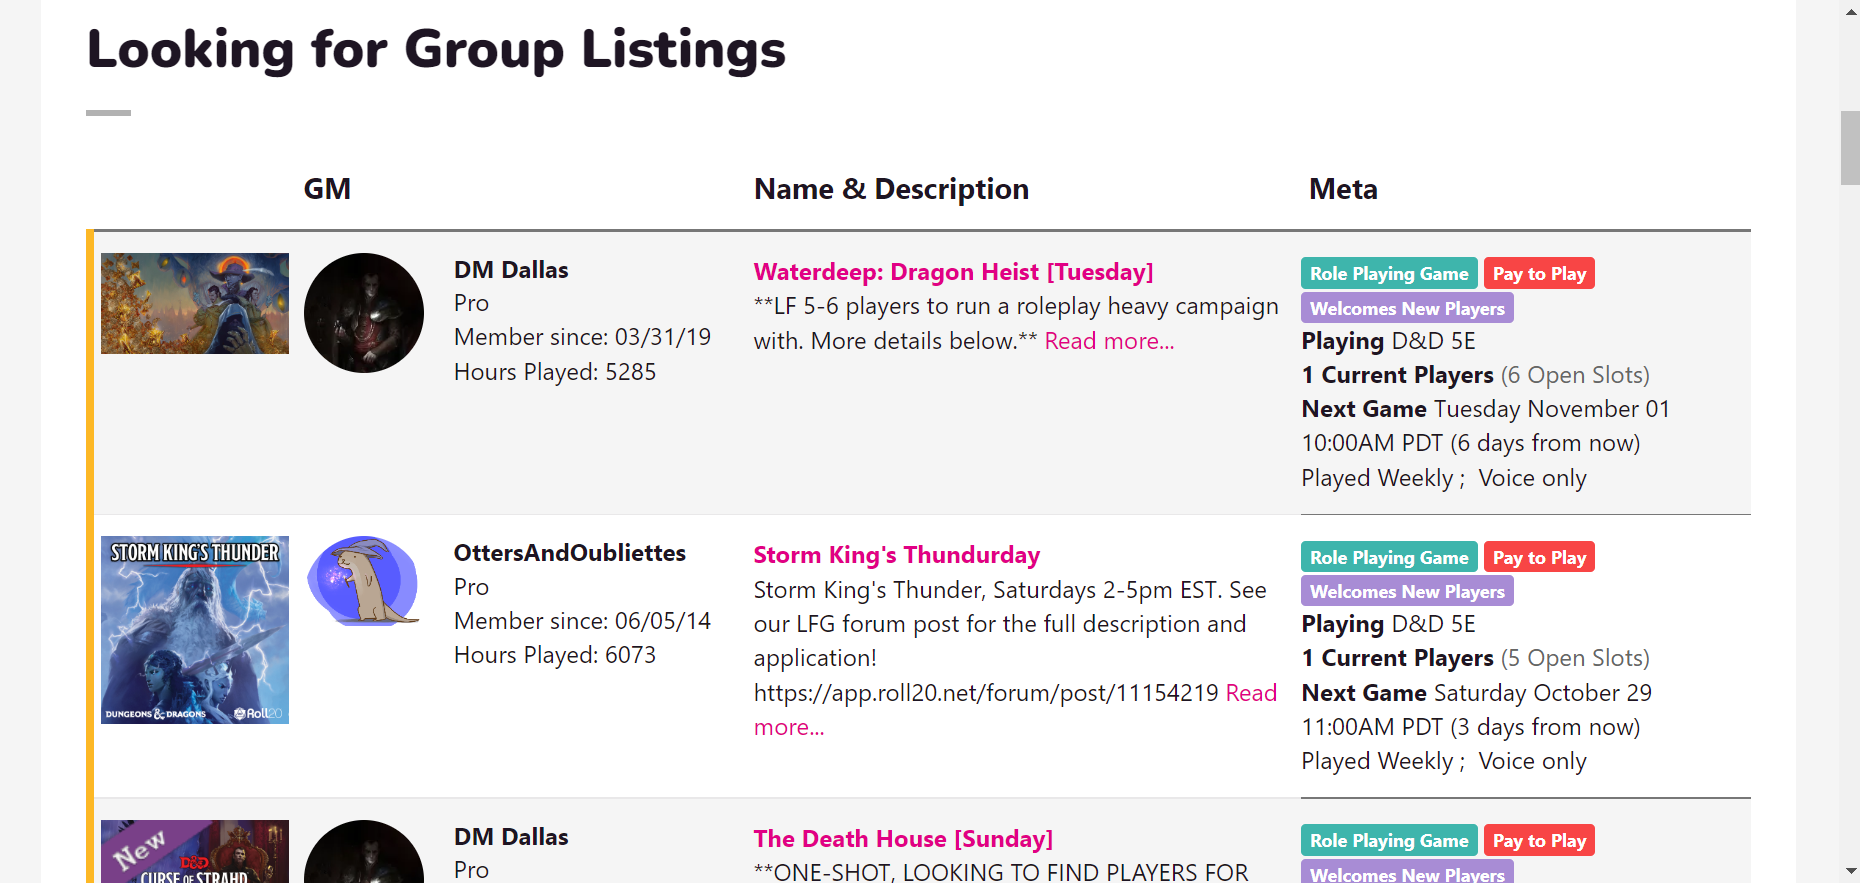
For those still needing a full party of adventurers plus GM, Roll20 has a Looking For Group forum. That page gives you a search tool where you can specify what you’re looking for. You can search for certain game types, specific adventure modules, and even check a “Only find games that welcome new players” box to ensure you match with like minded folks. Below the search tool you’ll find listings for already-existing groups that need to fill some seats.
Other ways to find groups are social media LFG channels and gaming forums. And, of course, I have to shout out our very own StartPlaying Games. Our site offers plenty of games in many different time zones with professional GMs. The nice thing about pro GMs is that many are experienced Roll20 users who are eager to help players learn the platform.
Whether you find a pro GM you like or go with an LFG group, you’ll eventually end up talking with your GM to prepare for the game. At that point, they should give you an invite link for their Roll20 game room. Sign into your Roll20 account, put that link in your browser, and you’re in! All you have to do is click the pink “Launch Game” button to enter the game.
Finding Your Character Sheet And Other Essential Menus
The GM controls what you see on Roll20’s virtual tabletop, as well as what information you have access to. As such, they tend to do a lot of the setup work for you. They create an entry for your character and will probably ask you for art so that they can make a “token” as well. Think of your token like your mini-figure in an in-person game–it will be the primary representation of your character on screen. The GM will also control more technical options like if music plays, how loud it is, and if video chat is enabled.
The left side of your screen should be dominated by your virtual table, be that a map or whatever image the GM is currently displaying. We’ll get to how you interact with the map in the next section. For now, look to the right side of the screen. You should see the text chat when you first sign in. You’ll also see several icons on the top right.
Clicking on these icons will take you to different tabs. First is the text chat, which is pretty self-explanatory. Aside from being able to type messages to all other players, you can put “/w player name” to private message someone. You can also put “/w gm” to send secret messages to the GM. By hitting “/roll” you can prompt Roll20 to roll die for you. Die roll results are displayed in text chat as well.
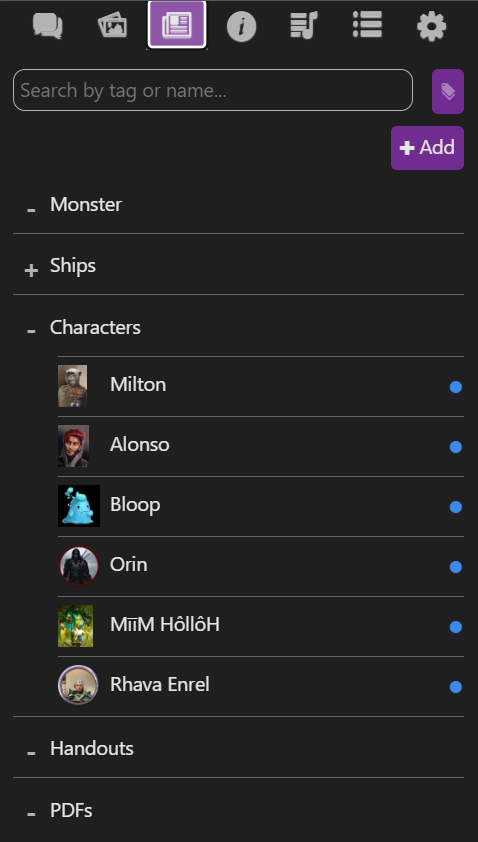
Next to text chat is an icon that looks like a little newspaper, the journal. The journal is where you will find your character sheet. Just click on your character’s name to access their page, where you should have the ability to edit information like their art, backstory, and stats. Roll20’s digital character sheet is attached to your character’s journal entry. You can use Roll20’s “Charactermancer” to automate the process of making your character sheet, or manually enter their abilities. This is one area where you’ll want to coordinate with your GM before changing things around. Some GMs will want everyone to use Roll20’s character sheet for synergy, while others will prefer outside platforms like D&D Beyond. Whatever your GM decides, the journal will be the place to find your character’s info within Roll20.
The other tabs are (in order) the compendium, jukebox, collection, and settings. You probably won’t ever touch the first three of these unless you become a GM. They control larger game functions like the music playlist or rollable tables. Feel free to poke around the settings menu if you want to change your display name or enable cool effects like 3D dice.
Using The Roll20 Map

Most of your time in a Roll20 game will probably be spent looking at the virtual tabletop. If you’re playing D&D, the tabletop will often be displaying a map. To add your character token to the map, click on their name and drag it onto the display. You should see your token appear and you’ll have the freedom to slide it around. All of your other tools for interacting with the map are on the upper left hand side.
These tools (in descending order) are the cursor, paintbrush, zoom, ruler, dice, and help.
The cursor’s default is your typical mouse cursor. You can select certain objects on the display, usually just your token, and move them around the stationary map. The other option is pan view, which fixes everything in place so you can grab the whole map and move it around. This is useful when you’re trying to take in the full scope of large battle maps, say for a giant war scene.
The paintbrush tool gives you the power to draw on the display. You can draw shapes for tactical use, such as denoting the circular area of a spell or crossing out dungeon rooms you’ve already visited. You can also use the freehand option to draw immature pictures to mess with your GM in the middle of a dramatic monologue.
The zoom tool is just that–hone in on the details of an image or pull back for a full map view.
The ruler changes your cursor into an arrow on the map. Keep holding and dragging the arrow to measure relative distance on the map. This is an easy tool to show how far a character is from something, and if they have the range to use that ability they were planning for. Hold the “Q” key while dragging to measure around corners and other non-straight distances.
Finally, there is the essential dice tool. Here you’ll find all the standard TTRPG dice. Click on your chosen option to roll a die or multiple dice as needed. Under that is the Help tool, which should provide answers to anything not covered here, but back to the dice tool. Use the “Advanced” roller on the bottom to roll fun things like 20d6.
And that should be enough to get you rolling on Roll20! Hope your game goes smoothly, and if you’re still looking for a GM, come check out our helpful pros on StartPlaying!


